
Arlo App
Users set up Arlo cameras in the house so that they can keep its security top-grade. But, managing the device by doing Arlo login can become a little difficult if one is bound to do so with the aid of a laptop or computer. In a time, where mobile devices are ruling the world, what if we tell you that you can manage your Arlo camera using the Arlo app for Android as well as the Arlo app for iPhone? The application will connect to the Arlo product and make your smart home security system as simple as it can be.
On the page, the breakdown of how to download Arlo app has been given. Go through these instructions and learn how to install the mobile application and manage your camera.
How to Download Arlo App for Android?
Ensure that the below-mentioned guidelines are read in the same manner as they are given to avoid experiencing technical issues in the future.
- Unlock your mobile in case it is locked and ensure that it is connected to WiFi.
- In case it is not, then go to the WiFi settings and locate the name of your router.
- Once the SSID or network name has been located, select it and enter the password.
- Make sure that you do not commit mistakes while doing so.
- Tap the Connect button and proceed with Arlo app download.
- Considering you are using an Android, go to the Google Play Store.
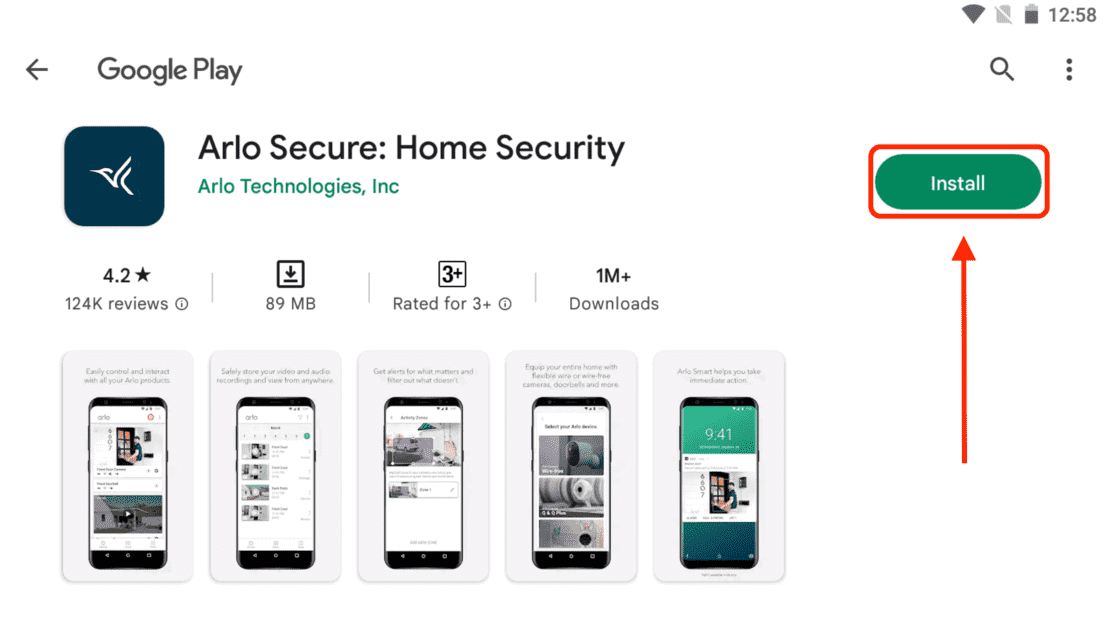
- Locate the search bar and input Arlo Secure app there.
- Tap the Search icon and hold on for some time so that the results can appear.
- Once done, select the name of the mobile app and tap the Download button.
- Soon the application will get installed.
In case you want to download Arlo app for iPhone, know that the entire process will remain the same. Only one difference will be there, i.e. you ought to make your way to the App Store rather than the Play Store
How Do I Manage HomeKit Settings via My Arlo App?
Considering you have downloaded the application now is the time to manage your camera. One way of doing so is to change the HomeKit settings to which the camera is connected. In this segment, you will learn how to edit a HomeKit Home, Room, etc.
Manage HomeKit-Enabled Devices
To Rename an Arlo Device
- Launch my Arlo app and tap Settings.
- Select the HomeKit option.
- Tap Devices Added to HomeKit.
- Select the Device Name.
- Add a new name and hit Done.
To Remove an Arlo Device
- Open the mobile application.
- Select Settings > HomeKit.
- Choose the device which you are using.
- Tap the Remove Device button.
- The device will be removed.
Manage HomeKit Homes
To Add a Home
- The first step will remain the same.
- Select HomeKit under Settings.
- Tap the plus icon next to New Home.
- Enter a name for the Home.
- Select the Continue button.
To Edit a Home Name
- Go to the main menu of the app.
- Tap Settings > HomeKit.
- Hit the Home button from the list.
- Tap Change Name.
- Do the new one and hit Save.
Manage HomeKit Rooms
For a Room Addition
- In the app, select Settings.
- Proceed by selecting HomeKit.
- After selecting a home, go to Rooms.
- Select the plus icon.
- Enter a name you want it to have.
To Delete a Room
- In case you have closed the app, open it.
- Select the HomeKit menu.
- Go the option called Settings.
- Look for this in one of the corners.
- Select a Home and hit Delete.
While you are making changes to the HomeKit setting, in case my Arlo app stopped working in the middle, restart your mobile device. The same can be done if you long press the power button, select the Restart button, and wait for some time.
In case this does not work for you, then you may consider creating a space on your mobile device. For this, you ought to make your way to the Settings menu.